Forecast

Deaching of the great explorer of the truth the builder
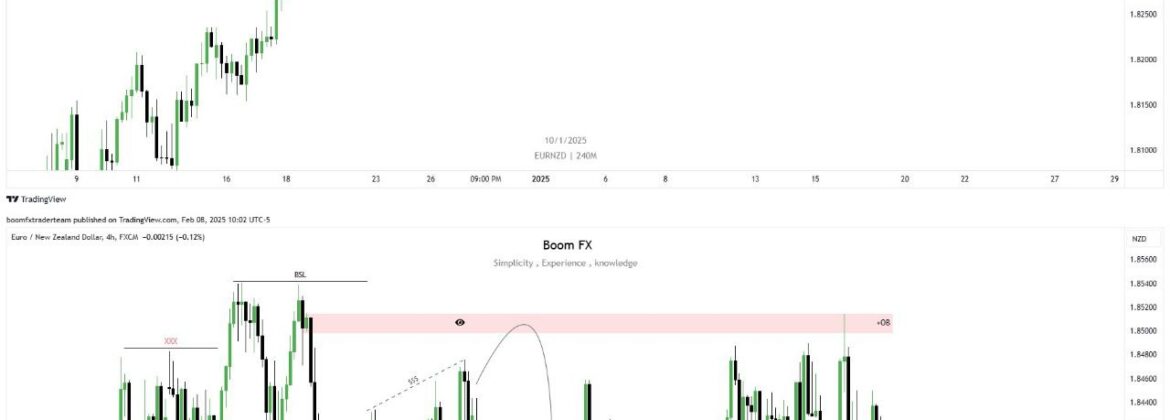
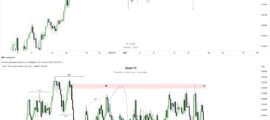
EURNZD Trade Breakdown & Future Setup 💥📉 Overview of the Chart: This image contains two EUR/NZD charts (top and bottom), demonstrating how a predicted bearish move unfolded successfully. Key Observations: 🔹 Bearish Order Block (OB) in Supply Zone (highlighted in red).🔹 Break of Structure (BOS) confirming the bearish shift.🔹 MSS (Market Structure Shift) indicating a […]
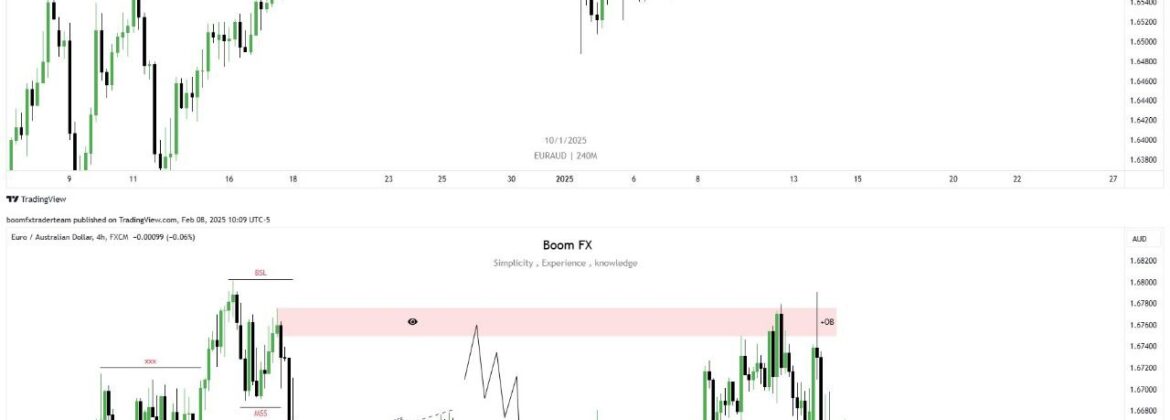
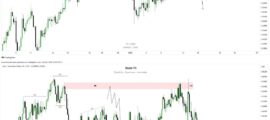
EURAUD Trade Breakdown & Future Setup 💥📉 Overview of the Chart: This image contains two EURAUD charts (top and bottom), showing how a predicted bearish setup played out successfully. Key Observations: 🔹 Bearish Order Block (OB) in a Supply Zone (highlighted in red).🔹 Break of Structure (BOS) confirming the bearish shift.🔹 MSS (Market Structure Shift) […]
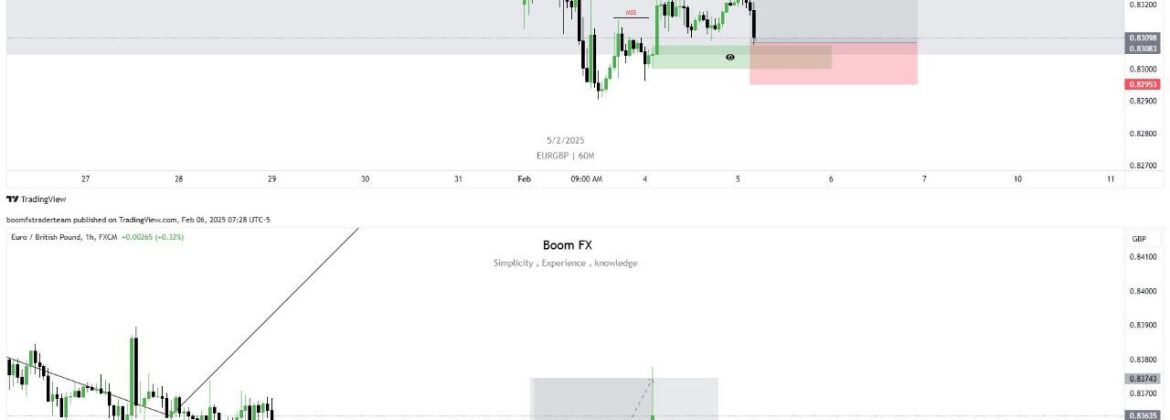
EUR/GBP Precision Trade – 66 Pips Secured (1:5 RR) 🎯🔥 Introduction This EUR/GBP trade exemplifies a high-probability setup with a sniper entry, yielding +66 pips and an impressive 1:5 Risk-to-Reward (RR) ratio. The setup was built using:✅ Liquidity sweep✅ Order block (OB) entry✅ Fibonacci retracement confluence✅ Bullish structure shift Trade Setup Breakdown: 1️⃣ Market Structure: […]
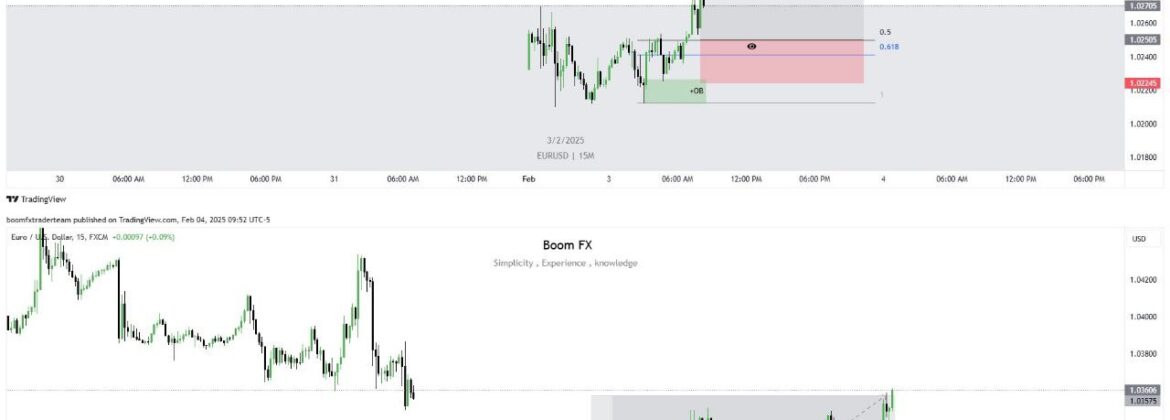
EUR/USD Sniper Entry – 107 Pips Secured (1:4.12 RR) 🎯🔥 Introduction This trade setup on EUR/USD showcases a precision-based sniper entry with a strong risk-to-reward ratio of 1:4.12, securing +107 pips. The setup is built on a liquidity grab, order block, and a Fibonacci retracement confluence for high-probability execution. Trade Setup Breakdown: 1️⃣ Market Structure: […]

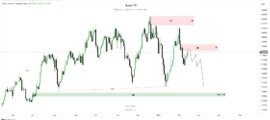
Introduction This chart setup exemplifies a clean application of supply zone trading principles in the Nasdaq 100 (US100). The analysis focuses on price reacting within a marked resistance (supply) zone, triggering a significant sell-off as expected. Trade Setup and Idea Conclusion This setup showcases the importance of combining technical tools like supply/demand zones and structure […]

NAS100 Trade Breakdown – Precision Execution 🎯 Introduction In this trade setup, we successfully predicted the movement of NAS100 with a high-probability short trade. By identifying key levels such as Order Blocks (OBs) and liquidity zones, we executed a sell position from a premium area and targeted a demand zone. This strategy showcases the importance […]

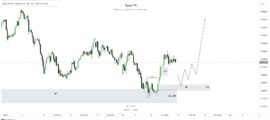
CAD/CHF Entry Update +70 Pips Running Profit 🚀Another clean and strategic entry on #CADCHF, delivering impressive results so far. Patience and precision are key, and this trade setup reflects that perfectly. 📌 Intro: At Boom FX, we focus on delivering high-probability trade setups by leveraging market structure and liquidity concepts. This CAD/CHF trade is an […]
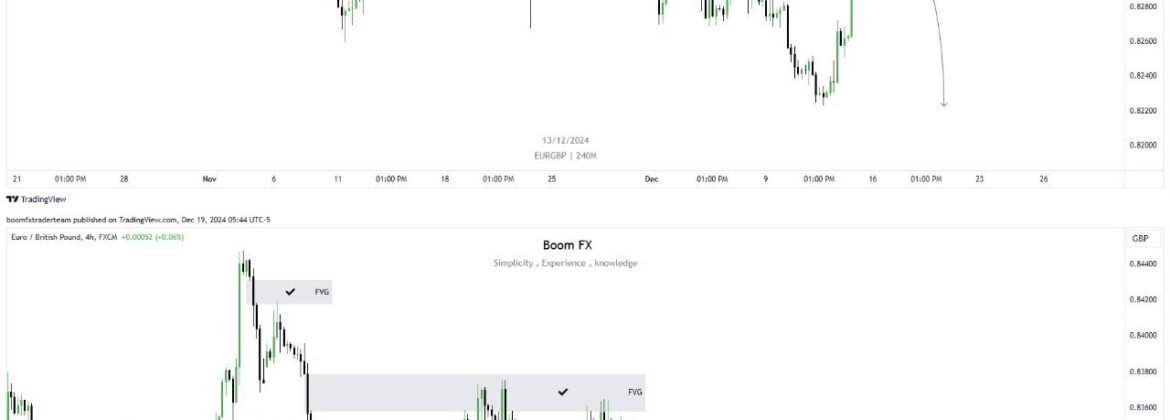
EUR/GBP Trade Recap – Target Achieved 🎯Precision trading at its finest! #EURGBP followed our forecast to the letter, delivering exceptional results. 📌 Analysis Overview: At Boom FX, our strategy focuses on identifying high-probability setups by analyzing market structure, liquidity zones, and key imbalances. This EUR/GBP trade showcases the effectiveness of that approach. 📊 Trade Setup […]

Gold Forecast Recap 🏆 – Target Hit! 🎯 Another precision move as expected on #GOLD. Here’s how our analysis played out: 🔹 Intro: At Boom FX, we rely on simplicity, experience, and knowledge to deliver accurate trading insights. This week’s GOLD forecast exemplifies our strategic approach to identifying high-probability setups. 📊 Trade Setup Breakdown: 1️⃣ […]

XAU/USD Daily Time Frame analysis has played out perfectly, with the target being successfully hit as predicted. The charts demonstrate a structured bullish move aligned with key technical levels, reaffirming the accuracy of the forecast. Key Insights: 2 0